Start using Otomate step-by-step
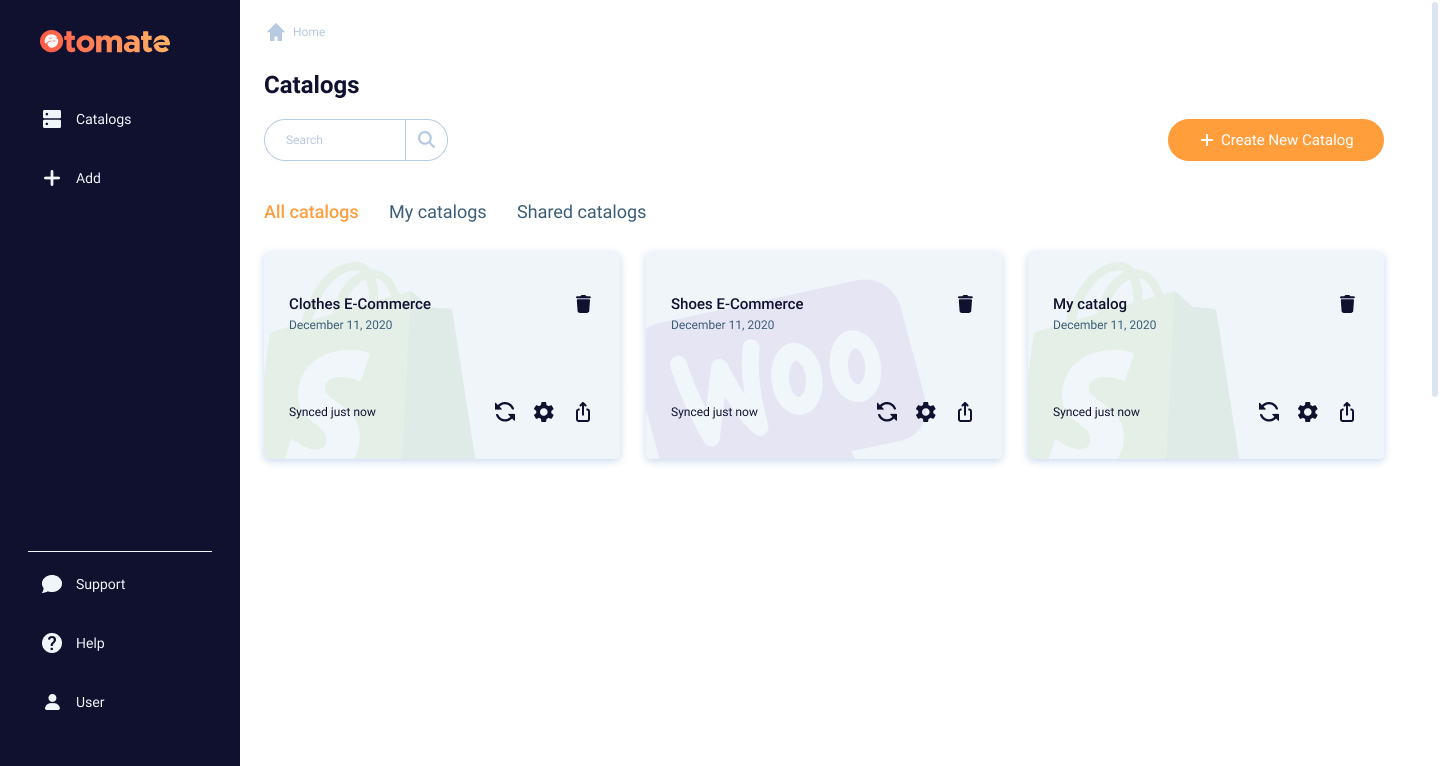
Step 1. Create a catalog
Click the "Create New Catalog" button on the Dashboard and name your catalog.
Step 2. Get your products in Otomate
Select the import option depending on where and how you store your product data. You can:
- Import from Shopify
- Import from WooCommerce
- Import using CSV files
- Import Manually
Learn more about Sales Channels.
Step 3. Quick Otomate Overview
To get off to a great start with product information management, it's important to become familiar with the basic features of Otomate. Once you've imported your products into the system, you're ready to begin working with them.
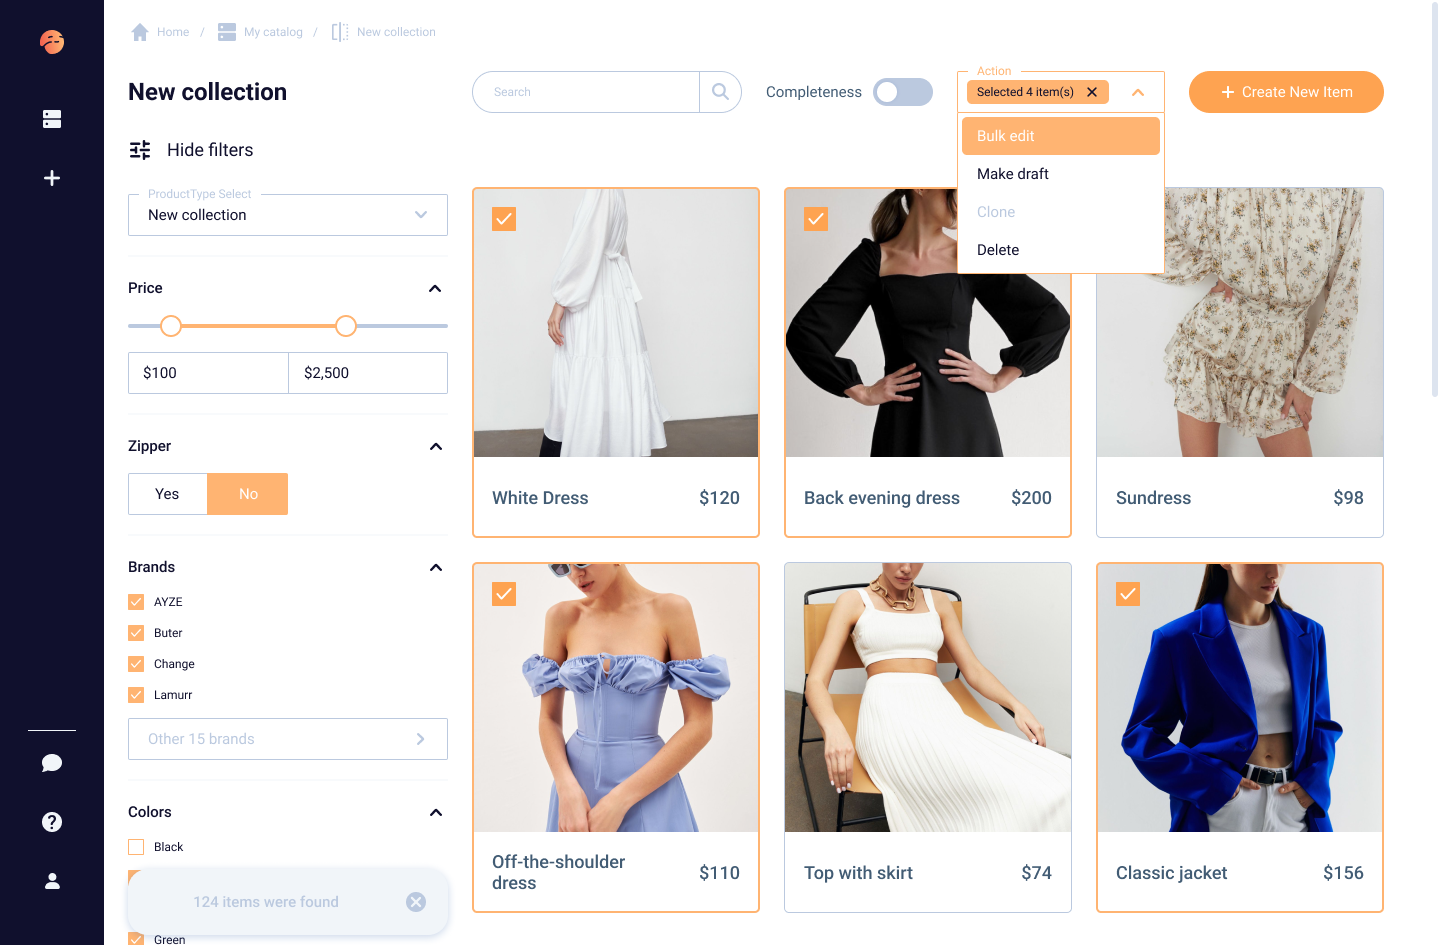
On the Items list page, there are a lot of important actions that can be done with the products:
- Filter Items by Product Types and Attributes;
- Search for Items by name;
- Edit and create Items;
- Bulk actions;
- Clone and delete Items;
- Track product information Completeness for eCommerce platforms;
- Export Items to integrated Sales Channels.
On the Product Types list page, you can perform actions with your Catalogs and Product Types such as:
- Edit, create, and delete Product Types;
- Search for Product Types by name;
- Create Items for a particular Product Type.
- Edit Catalogs Settings;
- Export Catalogs to existing Integrations or create new ones;
- Synchronize changes in the Сatalog with integrated Sales Channels.
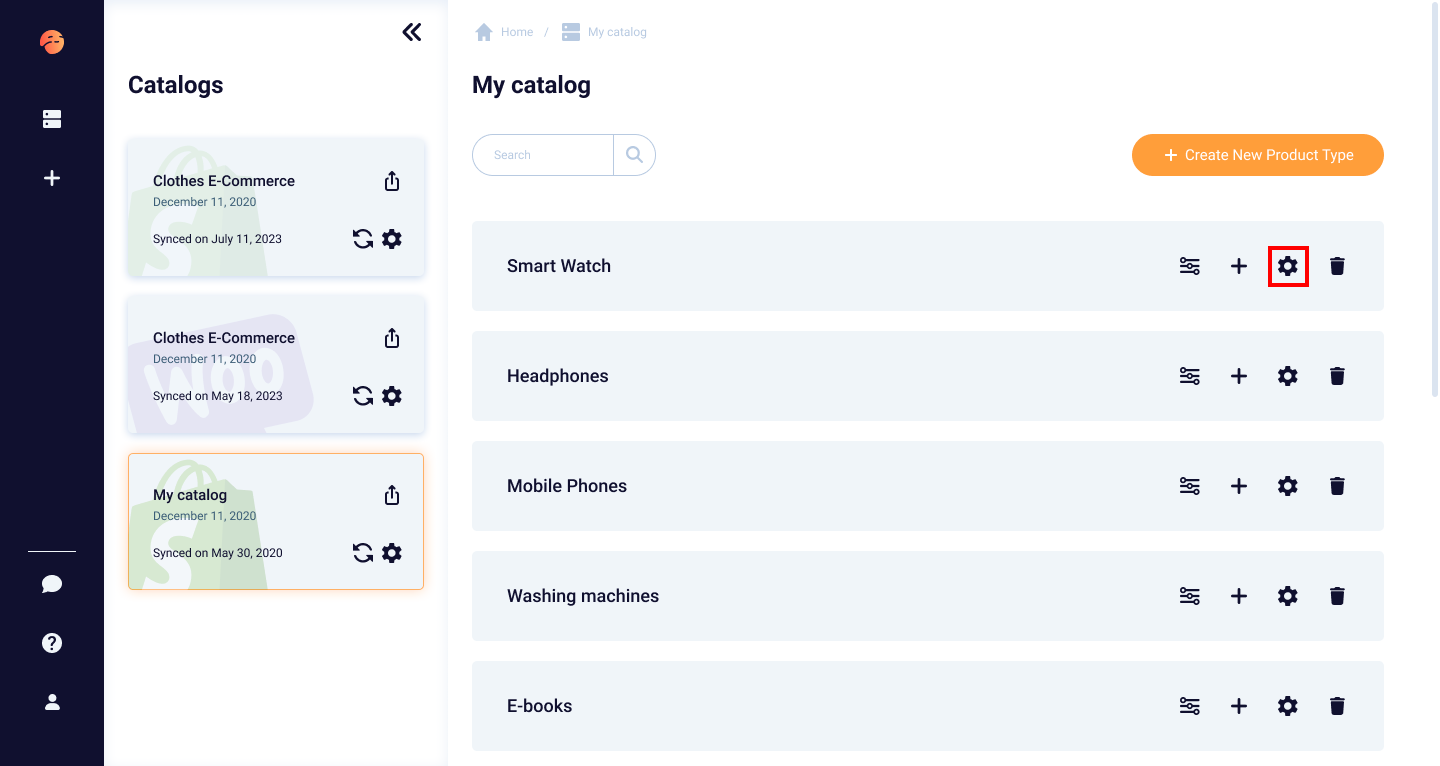
You can do the same things with Catalogs on the Dashboard as you would on the Product Types list page. It is also possible to create and delete Catalogs, as well as search for them by name.